 |
| ImageEngine 2.0 Documentation |
| 7. Using ImageEngine 7.1. Inspect The Inspect function creates a PDF document containing information about the images of the source PDF document such as:
This PDF document also includes links to show the image in the source document and to "Render" or "Export" the source image. To apply the Inspect function to the front document of Adobe Acrobat, choose the menu "ImageEngine" –> "Inspect…". Now the document dialog appears, allowing the user to adjust whether the function is to be applied to the entire document or to a range of coherent pages. There is also a button available to change the settings of the Inspect function. 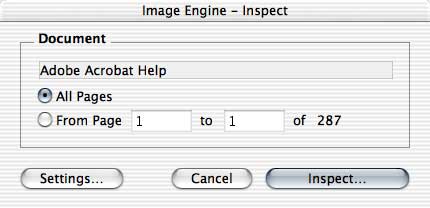 To cancel the Inspect function, press the "Cancel" button. To start the Inspect function with the desired document, press the "Inspect…" button. To apply the Inspect function to a PDF document, stored as a file, choose the menu "ImageEngine" –> "Inspect from File…". An Open dialog appears, which allows to select the desired PDF file. Using the cancel button of the Open dialog cancels the Inspect function. Since the "Inspect from File…" function can only be applied to the entire document no document dialog appears. Note: If the security setting of the source document is set to "No Content Copying or Extraction, Disabled Accessibility", ImageEngine asks for the password to allow "Content Copying or Extraction". 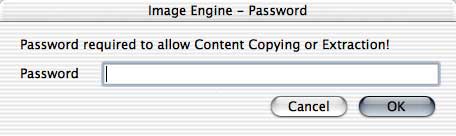 If an invalid password is entered, ImageEngine shows an alert and stops the current function. 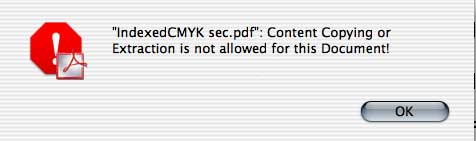 ImageEngine now shows a progress window. The function may be cancelled by pressing the key combination "Cmd" + "." or the "esc" key. 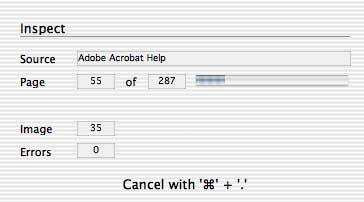 To keep the result of this function the user is now asked to confirm that he/she whishes to use this document. This alert window only appears if at least one image was found in the source document.  Further sequences depend on the settings for "Auto Save". With "Auto Save" off, ImageEngine shows a Save dialog to let the user select where to save the file(s) generated. With "Auto Save" on the file(s) are saved automatically in a newly created folder in the Auto Save destination folder. Note: The sub folder will only be created if ImageEngine could create at least one file. If the Creation Mode requires the creation of a PDF file, a progress window appears. This process cannot be interrupted.  Note: If the Creation Mode is set to "Create only" or "Create and View" and "Auto Save" is off, the user will be asked by a Save dialog to save the newly created PDF document as a file. If this dialog is cancelled, the new document will be neither displayed nor saved. The result of the Inspect function is a PDF document. Whether the document appears as front document of Adobe Acrobat or not, depends on the Creation Mode of the current settings. Creation Mode: Use the radio buttons to set, how the PDF document will be generated.
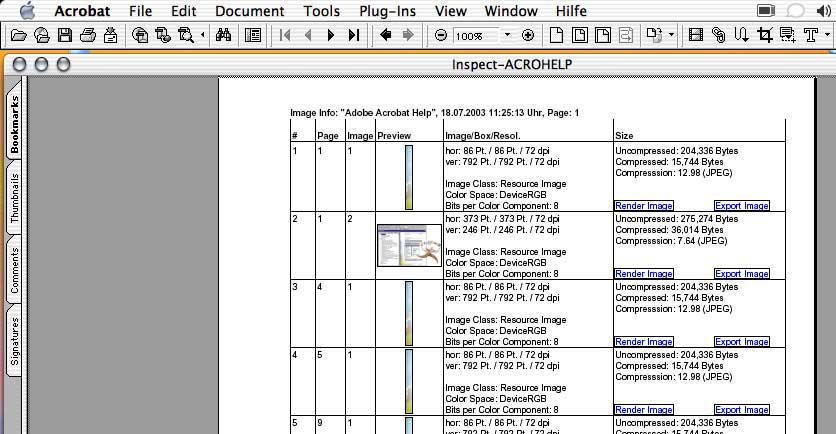 In addition to the information about the images, every entry also contains the following links: • The area of the preview image is used as a link to the image in the source document. • The area of the text "Render Image" allows the user to apply the Render function to the source image. • The area of the text "Export Image" allows the user to apply the Export function to the source image. This link is available for resource and mask images only. Note: The functions Render and Export are applied to the source image with the current settings of the respective function. |