 |
| ImageEngine 2.0 Documentation |
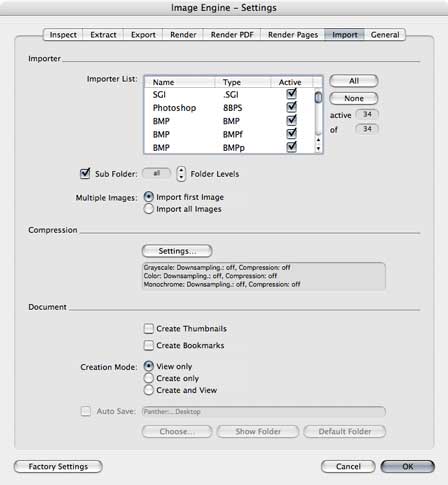
| 6. Settings 6.7. Import 6.7.1. Importer Importer List: The list shows all available QuickTime Importers by name, type and, activation status. This list is initialized at the launch time of the hosting Acrobat application. By default, all importers are activated. The list allows the user to activate or deactivate some or all importers. Sub Folder: If checked, the source folder will be scanned for images within the given range of sub folder levels. Multiple Images: Allows the user to decide, whether all or only the first image of multiple images in a single file will be imported (some image formats, e.g. the TIFF format can have multiple images in a single file). 6.7.2. Compression To set up the compression, press the "Settings…" button. The Compression dialog appears. There are separate settings for both, downsampling and compression, for gray scale, color and monochrome images. The text field shows the currents settings. 6.7.3. Document Create Thumbnails: If this option is on, ImageEngine automatically creates the thumbnails. Create Bookmarks: If this option is on, ImageEngine creates the bookmarks. Creation Mode: Use the radio buttons to set, how the PDF document will be generated.
The default destination is the Desktop.
 |
  |